
AppleInsider is supported by its audience and can earn commissions as an Amazon Associate and Affiliate on qualifying purchases. These partner relationships do not affect our editorial content.
If you want to start making music, a Mac is a good choice. However, depending on the kind of music you want to make, this isn’t all you need.
Whether you’re a budding musician or an experienced player just wanting to delve into music production, knowing where to start can be overwhelming. After all, you can’t just plug a guitar cable into the USB-C port of your MacBook Pro.
There are different equipment that different musicians need for different purposes. Here’s what you need to get started at the absolute beginner stage.
to mac
If you currently have a Mac, just use it – it’s very likely that you have at least one of the necessities you need to start making music. There’s also no reason to rush out and buy a brand new Mac in the first place.
Start where you are and use what you have. If you’re studying music or music production in college, or you’re dead serious about pursuing music in general, you can upgrade later.
Most Apple Silicon or Intel based Mac devices can handle the audio you need. Faster chips will result in a smoother and faster workflow, but that’s a luxury, not a necessity.
That said, if you have the option to buy a new Mac, aim for something with at least 16GB of RAM. Any M1- or M2-equipped Mac will do, as will recent Intel-based Macs bought second-hand.
The power of Apple Silicon is a big boon, but we like the 2018 Intel Mac mini (on sale for $499) given the ease of RAM expansion.
-xl.jpg)
You can really use any recent Mac for music production.
When it comes to storage, music files don’t take up as much space as videos. On the other hand, if you plan to create a lot of songs with a lot of tracks, the files can add up. You can always add storage space through external SSDs, but it’s still a good idea to buy as much storage space as possible without breaking the budget.
A desktop Mac is a good option for home studios, but a MacBook is more convenient for taking to jam sessions or for recording on the go.
If you do choose a portable, try to get one with active cooling – so a MacBook Pro, not a MacBook Air. While the fan can be noisy in some environments, Logic Pro X can be a demanding app that can cause thermal throttling in some workflows. This is especially true for projects with lots of tracks, effects, and plugins.
To Digital Audio Workstation (DAW)
A digital audio workstation (DAW) is simply the software you use to make music. If you have a Mac, you probably already have a DAW installed: GarageBand.
If you’re new to recording or making music, we recommend using the free GarageBand until you get the hang of it. Most DAWs have a learning curve and you probably won’t be able to use all the features for a while.
Once your skills have improved to a basic level, you can upgrade to a paid DAW. Logic Pro X is a good option because many of the skills you’ve learned on GarageBand are translated directly.
Logic Pro X isn’t exactly an industry standard for music production, but many professional musicians use Logic Pro X. Others may opt for DAWs like Avid Pro Tools, FL Studio, Cubase, or Ableton.
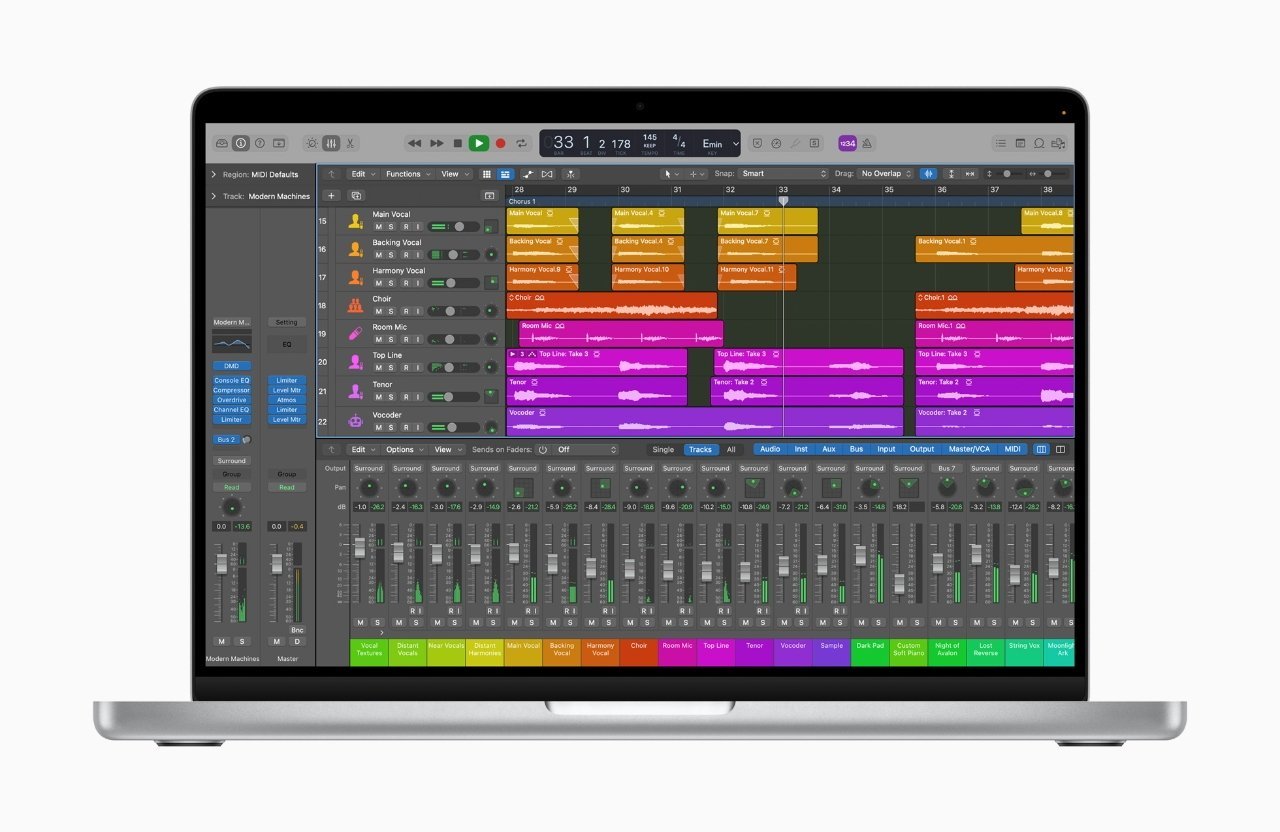
Logic Pro X is a great professional DAW to use for recording many types of music, but it’s not the only one.
Each has its own pros and cons and some excel in certain audio production techniques or genres of music.
Once you have a DAW, you can technically start making music – you don’t even need anything else.
For example, on GarageBand and Logic, there are many built-in loops, plug-ins, and sounds that you can stack to create songs. Both GarageBand and Logic also have “virtual drummers” who can deliver a realistic-sounding drum track onto your project.
You can also use musical typing to control an on-screen virtual keyboard and record that way.
Eventually, or maybe right away, you’ll need more.
A microphone & headphones
If you want to make music with vocals, you need a good microphone. The built-in microphone on your Mac is enough for Zoom conversations, but you’ll likely be disappointed with the sound quality for vocals or live instruments.
There are two general categories of microphones: condenser and dynamic microphones. For recording vocals and acoustic instruments, you’ll want to use a condenser microphone. They are generally brighter and warmer, and are better at picking up delicate sounds and higher frequencies.
A good beginner option is the Audio-Technica AT2020 Cardioid Condenser, which retails for $99 on Amazon. It is a favorite of musicians who record at home. (Note that you need an audio interface to connect it to your Mac, but we’ll get to that in a moment.)
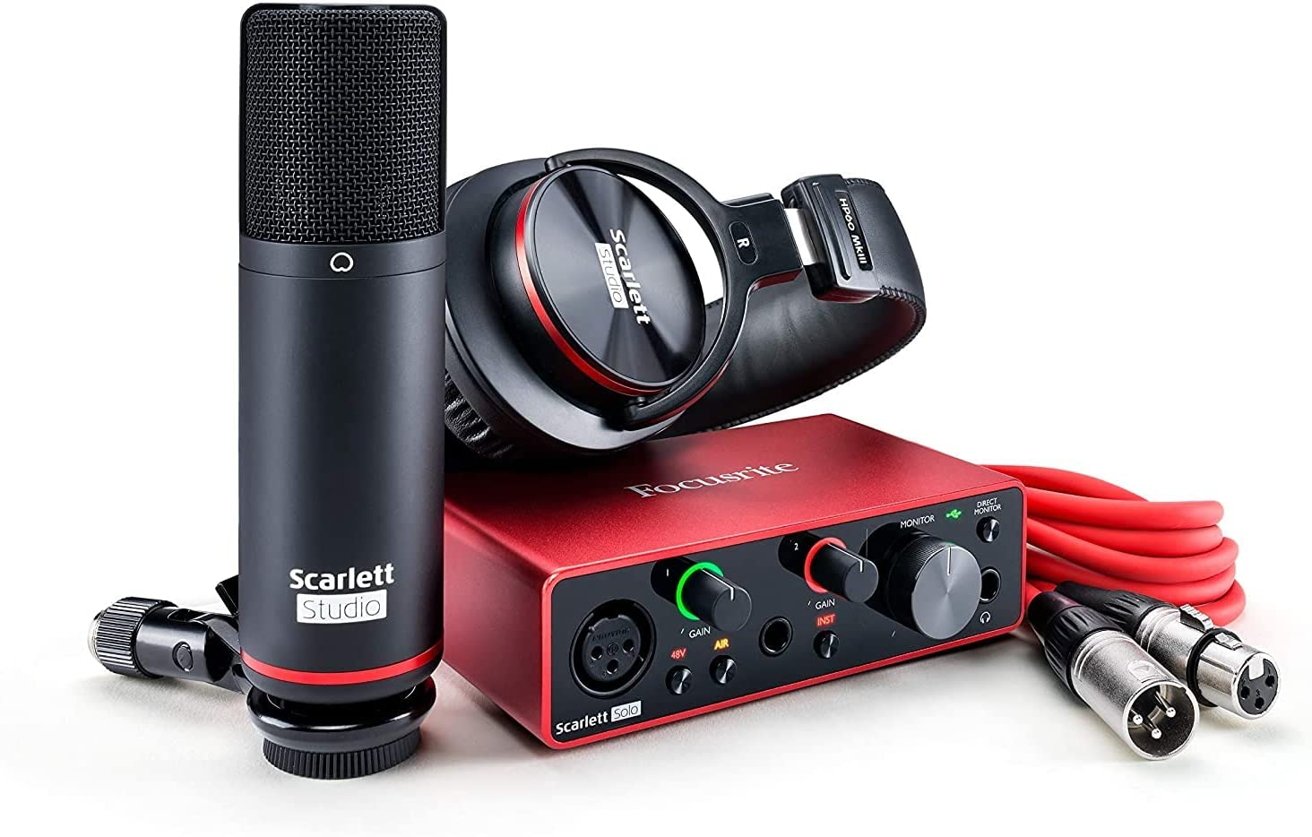
Singer or acoustic player? A microphone and interface bundle is a great way to start.
You may also want to consider a budget-friendly bundle like the Focusrite Scarlett setup. In addition to a Focusrite condenser microphone, it comes with an audio interface and headphones. Just don’t forget the microphone stand.
Speaking of headphones, you need those too. If you’re recording vocals or an instrument with a microphone, you’ll need headphones to isolate the sound coming from your Mac so it doesn’t “bleed” into the microphone (and create feedback).
Do not use Bluetooth or wireless headphones – there may be a delay or delay. Choose wired headphones instead. Good options are studio monitors such as the Audio-Technica ATH-M30 or the Sony MDR7506. Both are around $80.
If you plan to record guitar or bass amps, pianos, or other loud instruments, opt for a dynamic microphone. The Shure SM58 and SM57 are industry standards and cost about $100.
Recording live drums is a completely different story. In general, you’ll use a combination of multiple condenser and dynamic mics to mic specific parts of the drum kit individually. Definitely a more advanced order.
Whatever you record, you need a relatively quiet room.
For most indie recordings, your room doesn’t have to be acoustically “dead”, but a small closet with blankets around it ensures that you get a clean recording with little echo. You can also invest in foam pillows to darken your room.
If you’re recording a guitar or bass amp, a quick hack is to throw a heavy blanket over the mic and amp.
Audio interfaces and MIDI
There are two other gear that are essential for making certain types of music. As mentioned before, you need an audio interface to connect a condenser microphone to your Mac.
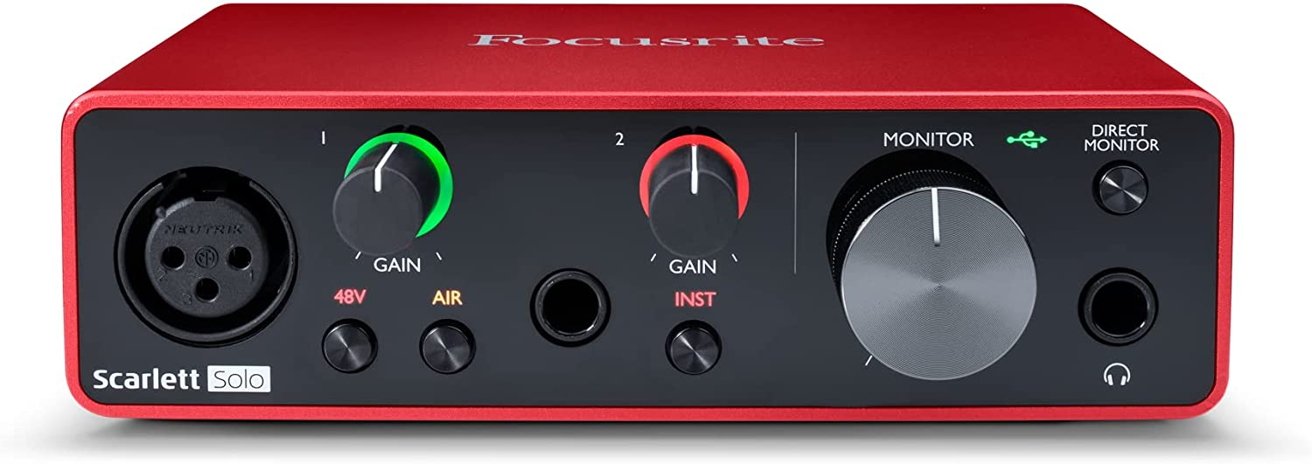
An audio interface is used to power some microphones and connect them to your Mac.
With an audio interface and a microphone, you can record most types of vocals and live acoustic instruments, such as acoustic guitars, violins and wind instruments. Guitar amps can be recorded with a dynamic microphone and an audio interface.
If you just want to record guitar or bass – and take advantage of the virtual amps in Logic and other DAWs – you can opt for an Apogee Jam. It’s a $179 portable interface that you can connect a guitar cable to.
While you can record pianos or keyboards with a microphone, another option would be to go with a MIDI controller.
MIDI is a standard that allows you to control virtual instruments or other musical elements in your DAW. Unlike an actual audio recording, you can play and edit MIDI notes to your heart’s content. For example, you can change the pitch, length, and timbre of a MIDI sequence.
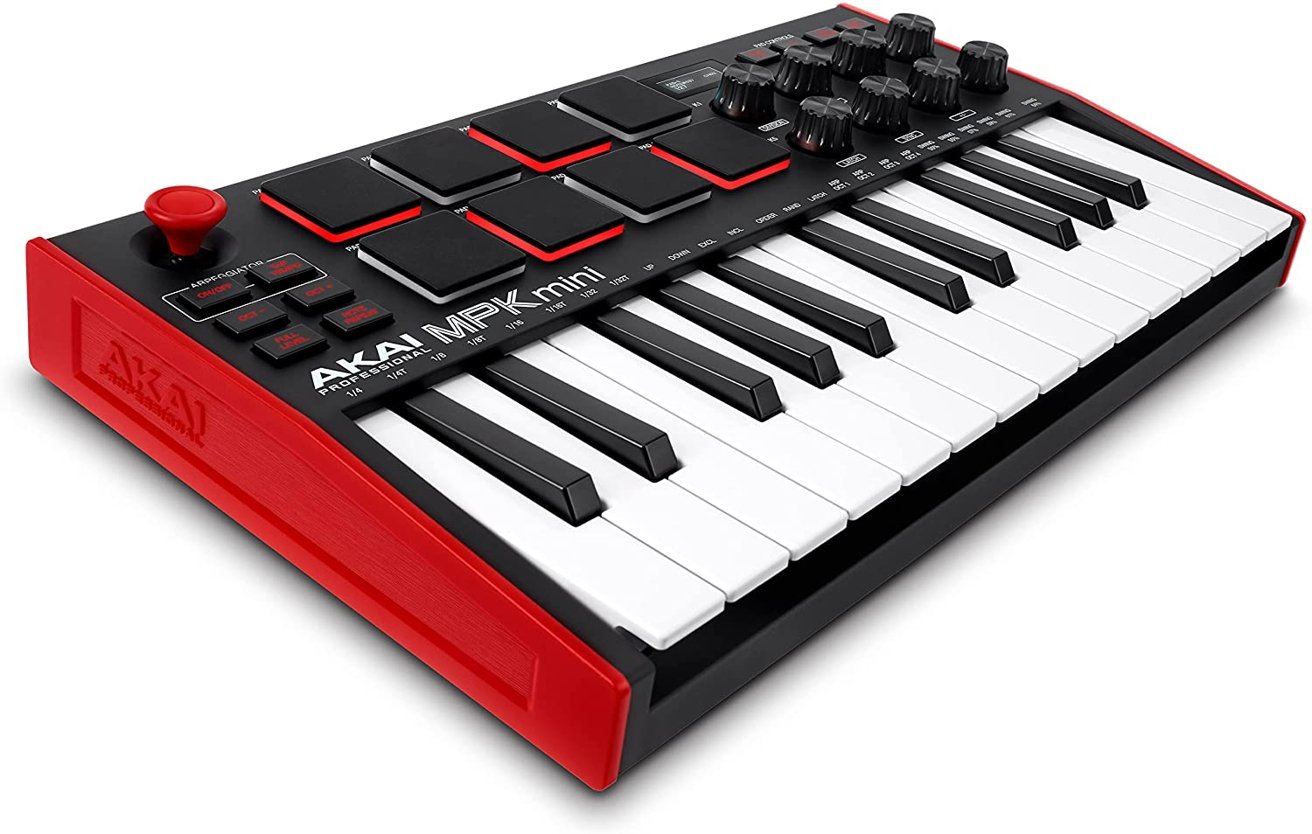
A MIDI controller is one of the most powerful tools in a music producer’s belt.
Those MIDI sequences can be used to control virtual instruments in your DAW. When you play a chord on a MIDI controller, you can apply almost any instrument sound to it. In Logic, there is a wide variety of virtual instruments, from keyboards and synthesizers to drums, violins and more.
MIDI controllers generally come in keyboard form. Most modern keyboards, digital pianos, or synthesizers have MIDI built-in, so you might just be able to connect that to your Mac with a MIDI-to-USB-C cable.
Use what you have first, upgrade later
Buying music production equipment can be overwhelming and expensive, even at the beginner stage. That’s why it’s important to stick to the rule of using what you have first and then upgrading later.
If you’re interested in music production or recording your own music, but have no idea where to start, just open GarageBand and play with it. Do this before purchasing any equipment.
Relying on my bandmate’s studio for most of my late teens and early twenties, I had no music recording equipment.
When the band broke up, I started recording music using GarageBand on an iPad. From there I slowly upgraded my setup and added new gear.
I’m currently using a Focusrite audio interface and the Scarlett mic for vocals and an Apogee Jam for guitar and bass. I don’t have a dedicated MIDI controller, so I just use my Casio PX-S1000 digital piano and a MicroKorg.
I’m primarily a musician, not a producer, so the barebones setup suits me just fine. I don’t make the latest pop hits, but the setup is more than enough to hunt down ideas and make songs that sound surprisingly polished. The point is to use what you have to start and upgrade later.
All you really need is a Mac, GarageBand, and an audio interface and microphone bundle to start creating acoustic guitar-based music. If you want to make instrumental electronic music, you don’t even need an audio interface – just buy a MIDI keyboard.
And remember that making music should be fun and not stressful.